Thursday, April 25, 2019

Animals as Teachers: Lessons From Dogs

Dogs. Common right?

WRONG!

Common as pets though. They themselves, as individuals, are not common. Not in any way, shape or form.

(My most recent canine teacher-Lucky)

The biggest lesson that we are taught from dogs is unconditional love. They love us unconditionally. Bad dogs are rarely born, they are made.

But there are other lessons to be learned from our canine friends. Dogs lead truly interesting lives when you think about it. Overall, dogs are happy about life. They are. Happier than a high percentage of people. Dogs remind us to live in the moment. Get yelled at but two minutes later you are being praised? Dogs deal with that all the time. Most dogs don't hold grudges, it's not in their nature. People hold grudges on a scarily high frequency. We need to take this lesson of live in the moment to heart and remember that whatever we are mad or upset about is a teeny, tiny blip in our lifetimes.

(Dogs give love unconditionally,, and show their affection in many ways-like laying next to you.)

Live life to the fullest is the next lesson from the dog. Dogs have heart-achingly short lives. Any dog owner has experienced this devastation. Compared to our decades long lifespan, our canines live roughly a decade. A decade and a half if you're lucky. Two decades if you're extremely lucky. Dogs truly live their lives to the best of their abilities. Many are happy so long as their owner is near them, others thrive on walks or play time, and still others thrive on trekking along or riding along with their human, or even chewing on a toy or stick. How hard is that to comprehend for us? We who thrive on complexity (in appearance).

(Living in the moment is another lesson that can be learned from our dogs)

And a sub lesson in the above lesson is that you need to enjoy the little things. Those precious moments of time spent with your pet or other loved ones. Time, no matter how long or short it is for you, is precious, make sure you're spending it the right way. Do things you love rather than things you hate. Instead of putting off that walk, go take it, even if it's just around the block. Learn that skill you wanted to learn.

(What motivates you?)

Another lesson from dogs is learning what motivates you to learn/work. Is it food? Play time? Petting--wait, that's dogs! But in all seriousness, what motivates you? What inspires you? What makes you WANT to work? We think of all sorts of things to motivate our dogs to learn new tricks or skills, yet we take so little time in looking at ourselves and what motivates us. And really, are we that more complicated than dogs? I don't know about you, but the minute someone says free food, I'm usually there.

(Ever forgiving)

Forgiveness, is another huge lesson from our canine friends. We can yell at them for doing something bed and while they may sulk for a bit, or avoid you, they are quick to come back. They forgive in a way that we, as humans, should really study and try to emulate. We'd ALL be a lot happier if we did so.

(Thinking a bit more about your canine companion(s) now? Good!)

The final lesson to take from dogs, so to live in the moment. Too often, we dwell on past events or even future events. Think about for a minute. Take your time. I'll wait. Still here. Keep thinking on it. A bit more...oh come on! Pause for a minute! Quit reading for 1...2...3... And we're back! We don't live in the moment. We live in the past & future but rarely in the present. No wonder so many of us aren't happy! We don't know how to live in the moments we're in. Something always needs to be better or could be done better, or something needs to change--but what about now?! What can you do now? How can you be happy now? What do you need to let go of to be happy now? Dogs, live in the  now. They aren't worried about what happened yesterday much less what happened an hour ago! They want to eat that treat in your hand, or lay next to you, or know that you're close. How fascinating is that, am I right?

We've got a lot to learn from our animal friends, and we're not done with them by a long shot.

Till the next time!

Tuesday, April 23, 2019

De-stressing

We all have crappy days-some more than others-but the important thing is to find something or do something that makes you happy/relaxed. For me that’s reading, writing, art, my pets, friends, some family, etc. Try not to dwell on the stressor & instead let yourself go into the moment of relaxation.

Today, for me, it was putting baby fur colored pencil detailing on this foal I’m working on for a friend.

(In progress picture of above mentioned foal.)

Saturday, April 20, 2019

Animals as Teachers: Lessons from Horses (Part 2)

First, allow me to apologize for missing Thursday again. I've been going through a rough patch, but it will be temporary, like they all are. Back to what you really want to read about-the horses.

~~~

(Blue-eyed Buddy after class.)

I was that girl who dreamed about horses. Not just owning a horse, or simply riding, but mucking out stalls, taking care of them. I was that girl who would have worked my ass off to have a little time to spend with them.

There came a point in my life as I entered college that I thought that I would have to just stick with their plastic counterparts. I couldn't get my foot in the door, much less find someone who would let me work with them.

Then it all changed.

(Dan the Morgan at the end of our ride.)

I have a Bachelor's Degree in Agribusiness and a minor in Entrepreneurship. I am weeks away from finishing my Associates in Equine Applied Science, and I still want to finish my certification in Equine Massage (though I will be moving to a new job so that's temporarily on hold).

It's not easy living in a small town/rural area. It has its perks, but job wise, it's not an easy thing to deal with. Jobs are few and far between and qualified candidates can boil down to a simple fact: who you know.

Well...I didn't know anybody. While qualified, I was an outsider.

So back to studying I went in the field I loved even more than just agriculture. But even before this moment, I met a man who was beyond kind in letting a horse crazy girl like me work with his horses. We are good friends now, and the horses from last post all belong(ed) to him. He taught me the basics of groundwork and riding, schooling has refined it.

My two teachers at the equestrian center have also become good friends. It is through them that I got my newest job/even knew of the opportunity. They have taught me so much more than I would have dared to ever dream only a few years ago.

But it's the horses' were interested in. For while the teachers' can teach us theory, the horses genuinely show the how and the why.

(A pleasant ride in the arena with Dreamer.)

Piper, an old bay Arabian gelding, was the first horse I learned how to trot and canter on. Due to being unbalanced in the saddle, I took a tumble out the first time we cantered. Good ol' Piper slowed to a stop and looked back at me with an expression that said "Now why would you go and do that? We were doing great!" He could be a bit grumpy while being saddled, trying to nip at you as the girth was tightened, but I never held that against him. I don't like tightening my own belts. He was ever patient, ever kind, and always a joy to see at the barn. It was with a sudden, cruel swiftness that we lost him last summer during the kids camp. I saw him only a couple hours before his death, saying I'd see him tomorrow. Little did I know. He left a legacy of people behind who loved him and appreciated that he was the horse that they learned to ride on.

(Me and Hale)

Next came Cue. A grouchy, bay Paso Fino who thought he was in charge 24/7. It was through Cue that I learned how to be firm with a horse. Horses weigh roughly 1,000+ lbs. compared to our measly weights. They are muscular, swift and while they might not necessarily mean to hurt someone most of the time, they can do it accidentally. Bad behaviors can soon become dangerous or "cute" behaviors when they were foals can turn into terrifying behaviors when they are adults. Cue taught me how to communicate with a horse using their language.

Horses are generally quite animals. Domestic horses, of course, are louder than their wild counterparts. That being said, if you ever watch a herd of horses, be they domestic or wild, you will see them communicating. Ears, eyes, tails, legs, teeth and really the whole body are used to communicate on how they are feeling. Kicks, nips and bites are used to communicate displeasure and/or dominance. Cue in his herd of three that included two other Paso Finos demonstrated this to our class as we watched. While working with dominant Cue, I had to learn how to be dominant over HIM so that I could keep not only myself safe, but him too as we worked on ground manners/handling.

(Hale wanting a treat)

From here we hit the "giant" era of my schooling. I would be riding and handling the draft horses of the barn. First came Hale, a black Percheron who was coming back from a neck injury and had been sitting for several months. He was my horse in Training I. Our first day, he bucked me off (not that it took a lot back then to do it either). The next time I rode him, he broke his girth on the saddle in his attempt to unseat me. I would be lying if I said that I wasn't afraid of him. It was on Hale, however, that my riding and my communication to any horse while riding, started to improve. Believe it or not, Hale is now one of my favorites to ride, as he and I get along great, and he is a willing horse, he just needed a small refresher and for me to understand how I was sitting in the saddle, how I was holding the reins, what I was telling him to do with my kicks, rein pressure and body. I would be riding lots of other draft horses from than on, including Rohan a chestnut Belgian/Quarter Horse cross, Soa a dark bay Percheron mare, and Stone a bay Clydesdale. I would ride them for my Riding II class as I continued to hone my skills, and while they didn't necessarily stand out as much as Hale, they still assisted in bringing him the points he'd taught me.

(Dreamer after our ride for the day.)

Two falls ago, I met Dreamer a young chestnut blanket Appaloosa. He is the last lesson horse who really stood out in my schooling. He was a stallion until the semester before I took my class, and while he is a sweetheart, he likes to bluff, and those bluffs can be downright intimidating. Thankfully, what I learned from Cue made Handling II with Dreamer fairly easy. It was that summer that Dreamer started to show me more. The horses I'd ridden before helped me to learn how to ride. Dreamer MADE me ride. He still does. He likes to buck out of excitement, irritation or just to test me. He is still young and learning, and while I am not his trainer, I am the in-between rider between the trainer and owner (who is handicapped). I am competent enough to know how to ride and what Dreamer needs work on, while still being inexperienced enough that he and I are learning together.

(Dreamer was a bit sassy after our short ride Thursday.)

I am grateful that even once the summer ended I could still come and ride Dreamer, and while there would be more horses for me to ride and learn from including Buddy a chestnut Paint gelding, my Training II horse, Morgan a black Morgan gelding, Athens, a chestnut Arabian I have lunged and ridden for my teacher, Riesling (Reese) a bay Arabian/warmblood mare, and Lacey, a Fleabitten grey Arabian mare that I have only lunged on a couple of occasions.

(Buddy being silly and standing in his tire-hay feeder.)

Which brings us to the last part, and it's that-you never stop learning. My Stress Points I class massaged Lacey last week as we reviewed stress points. I have only lunged Lacey 2-3 times before that. I've never ridden her, and I have only interacted with her one to two times outside of that. I do not know this horse. The only reason I stress this is that out of the four of us there that night (teacher and two other students) when I led her up to the arena to let her run around-I know her enough to know that she has quite a bit of energy so that it was likely she'd run around in the arena feeling good after her massage-she followed me. Without a halter or lead rope. She followed me even when I started to jog. It was quite the experience, and a good reminder that I will have more to learn, be it about horses or in life, there is always more to learn, more that will surprise me, and more that will make me cherish life.

(Lacey following at a trot as I jog. She even stopped when I stopped, not going ahead or away.)


Wednesday, April 17, 2019

Animals as Teachers: Lessons from Horses (Part 1)

While we, as humans, like to think that we are superior as a species, the reality is that we are not superior. If anything, we are inferior, as we find it hard to communicate with other species, yet other species have a relatively easy time in communicating with other species (not just us).

For my next two posts, I want to reflect over my animal teachers; specifically horses.

We'll start with horses that I have met outside of my schooling first.

While I had some interactions with horses before these listed,  none were more developed than those that came into my life through my friend.

(I miss this sweet boy still--Zip.)

First up, is Zip, a large, few spots/near white Appaloosa gelding. This boy was a great horse for me to start truly learning to ride. I had limited experience up until this point, and it was on this gelding that I learned the basics. Funnily enough, he and my friend did not get along well, and Zip bucked on him several times. When I rode him, though he was gentle, and took care of me, only bucking once due to another horse spooking.

(Alpha Horse-Bubba)

The next horse would be Bubba, an Appendix Quarter Horse, who taught me that as much as I like Thoroughbreds, they might not be the right match for someone like me, who prefers trail riding (as a whole, I realize that some are perfectly suited for this). While he was great to work with on the ground, he was a bit too "hot" for me to try and handle riding wise for my experience level at the time, and while I will always admire his beauty (that wedge-shaped Thoroughbred head on him!) I learned that I would most likely be a stock horse person due to their calmer demeanor. He was also the first to teach me about herd hierarchy, which had been something I'd only read about. Bubba showed me in person how a herd hierarchy works and how a good alpha/lead/head horse functions. He disciplines members of his herd, protects them, and of course, makes sure he eats first. All that aside, I starrted seeing the language of horses at work. It would take my classes to understand what exactly it all meant though.

(Banjo-Bud investigating all the grooming tools)

Then there's Banjo. A solid bay Paint Horse with chrome (white markings) and blue eyes. Banjo has taught me that you may not always get along with a horse, and that it's okay. Picking your battles is just as important as riding every day. He and I have had more ups and downs than I can count, but at the end of the day, I still like him. He's a good horse for the owner, and while I may ride him from time to time, he and I just have a day to day relationship of "let's see what mood we're in today".

(Rusty-Colt)
Next is Rusty, a young horse who reminded me in no uncertain terms that I will always have something to learn-and that's a beautiful thing, truly. After taking my classes I was confident in my skills and decided I'd teach Rusty to lunge. This went fairly well to start and then one day he refused to go out and caught my hand twice with his kicks. I didn't know what to do. Stark reminder that I still had a LOT to learn, and I probably always will. I'm perfectly okay with that, and I just needed that reminder (though I could have done without those kicks!)

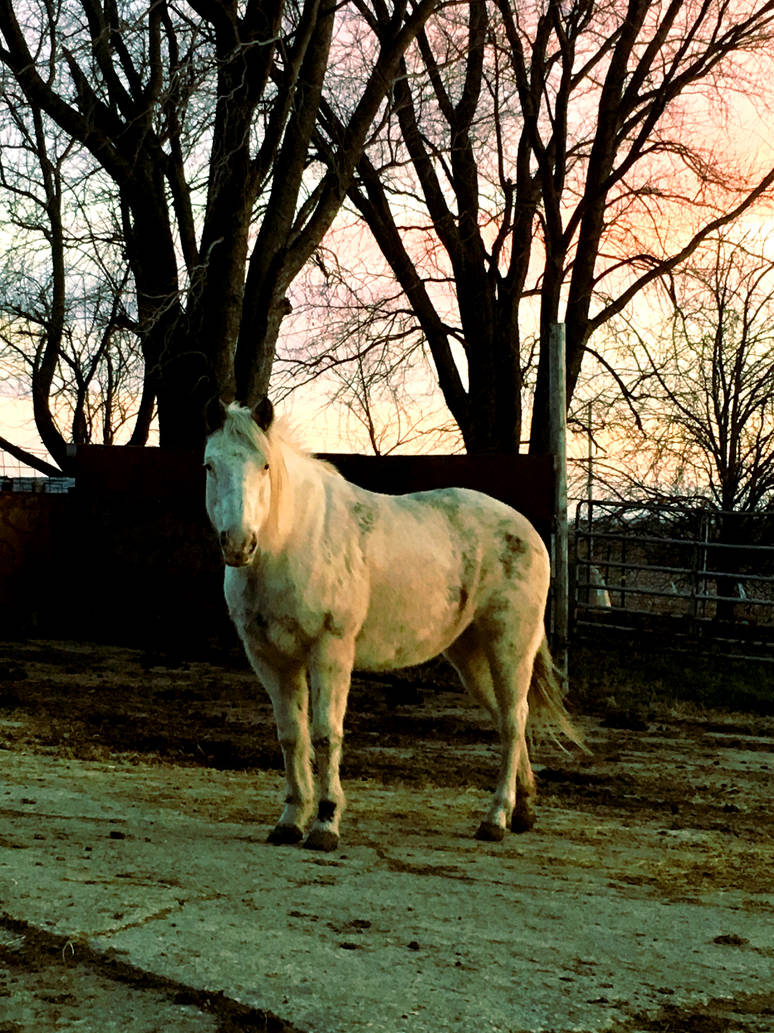
(My favorite photo of Snowflake)

While there have been others horses who I have met, this is the last one who had several lessons to teach. Snowflake, my Little Mare. When my friend was injured, I did chores for him, helping him out, being the way he is, he wanted to pay me back, but as he'd been out of work before his accident, I refused money. As he still wanted to pay me for my time, I accepted Snowflake as payment. At first, I did not like Snowflake. Shocking, I realize, and I shake my head at my stupidity at the time, but I became fond of her, and I like to think she of me. I achieved my lifelong dream of owning a horse...and it only lasted a year. 

(Little Mare)

Snowflake, while well-broke, would not stay sound. This quickly ate up any funds I had for her care and upkeep, and it was a gut wrenching decision to sell her. I am not ashamed to admit that I cried when I had to part with her. Even knowing that she was going to a good home with two little girls who loved her, the little girl in my own soul was broken and dejected. I had my dream, and I'd let it go. Thrown it away. Wasted it. In that is the lesson though, while it hurts to part ways, you need to do what's best for the animal(s) in your care. I could not afford to have a chiropractor come out constantly to treat her--her new family could/they weren't going to use her in the same capacity I had wanted (trail horse for me, simple riding horse for the girls).

(Another favorite photo of Little Mare)

She taught me many things though: the trust and love a horse can give to its person, learning to communicate both on the ground and from the saddle, how to take time in my busy days to go and see her, to be with her, not just to ride, and this would lead to how to take time for myself and those I love, not just working myself to death. I'm sure there were others but those were her biggest lessons.

(One of my last pictures of Snowflake-an intimate moment when she and Roger-donkey-allowed me to be apart of their herd. What the picture doesn't show well is that we are pressed together, shooing flies from each other, with me between Roger and Snowflake.)

These are horses outside of my schooling. The next post will be of the special lesson/school horses who have taught me many of the valuable lessons I now use when I work with these magnificent animals.

Till the next time.


Thursday, April 11, 2019

Making a Medallion

Clay is a fascinating, fun and relaxing medium to work in and it's one I've very much missed working in. 

First, let's take a look at the tools I used to create this medallion: a rolling pin, a shaping tool, a needle tool and part of a brick.


Next, we should look at my subject for this medallion, my mare, Snowflake. Now I do have a fairly good idea, even after I sold her, of her anatomy as well as a horse's anatomy in general. This is an important thing to understand as it will aid you, the sculptor, in creating your piece. The more knowledge you have, the better your piece will look.


As I do not have clay-clay available, or even a ceramics studio nearby to work in, I chose to work in Sculpey clay as I find it to be a reasonable substitute for true clay. I start by rolling out the clay to my desired thickness. With this medallion being for me, I wasn't too worried about consistency of the thickness, if this were for production, I would have used the ruler to make sure it was all level, or even had several rulers of similar width together so that I could get an even thickness throughout. From there, I proceeded to cut my edges off to make a square, as I wanted to do a square medallion.


Once I cut the square, I realized I had a boo-boo on one of the corners from not going slowly enough with my needle tool when cutting. So I altered my plan, which you will see at the end. 


In the meantime, I smoothed out the edges. You can do this with water, or if you aren't worried about what others might think/it's just for you...you can use saliva too (plus, it goes into an oven or kiln, germs will be killed off). I then proceeded to free-hand a drawing of my mare onto the clay itself with the needle tool. After I'd completed this, my friend, Shannon, reminded me that I you could also trace your original reference (hard for me as it's on my computer screen-which is also a touch screen) and then proceed from there to get the features onto your clay. 


Originally, I wanted to just manipulate the clay, but I had the clay too thin to do this, so instead, I built up from the drawing. Immediately, you will see that I oopsed and made my mare's muzzle too long, and didn't correct it, but you will also notice that we now have depth to the piece, and that was from just adding the muzzle. I added said muzzle by rolling out another small sheet of clay and morphing it to the muzzle's rough shape. As it is hollow inside that piece, I will add a hole later on so I don't risk that part blowing up in the oven.


From here, I continued to build up the face with clay, while still working to create depth. The idea is that the clay will "fade" to the original drawing. I also added Snowflake's eye by carving it out, and then rolling a small ball of clay and placing said ball into the hole. If the ball is too big, it will "bulge" out, and if it's too small, it will not fill the hole adequately. To ensure that the ball stays, use water or saliva again to help it adhere.


Then I proceeded to build up areas of the face an neck. I also added the edge of her nearest ear and carved out the hollow part of both ears. I also used the needle tool to add a mane and forelock. Note that I do not necessarily follow Snowflake's picture to a "T". While it's fine if you choose to do so, it's artistic freedom that allows for creativity to flow too. 


Next, I start to smooth out all those lumps and bumps of clay, working to get them to resemble a horse more closely rather than the building blocks they were. Again, water or saliva (you don't have to lick the piece either, just the tip of your finger) to get the clay to smooth out. I also started to add lines to exaggerate where the parts of the horse's face.


I continued to smooth out the face, and then I used the brick to give texture to the background. I really like texture on ceramic pieces, and this is no exception! I also used the needle tool to cut the other three corners off. I could have added clay to that original base, but I decided I liked this look better.


I then went through with the curved edge of my shaping tool to define my mare's face against the background and to aid in the overall shape and definition of her head too. 


I continued to work on the medallion doing little finishing touches, that continued to emphasize the head, smooth out the bumps and such that were still on the medallion including the hole at the nostril I mentioned above. From there, it was to the oven.


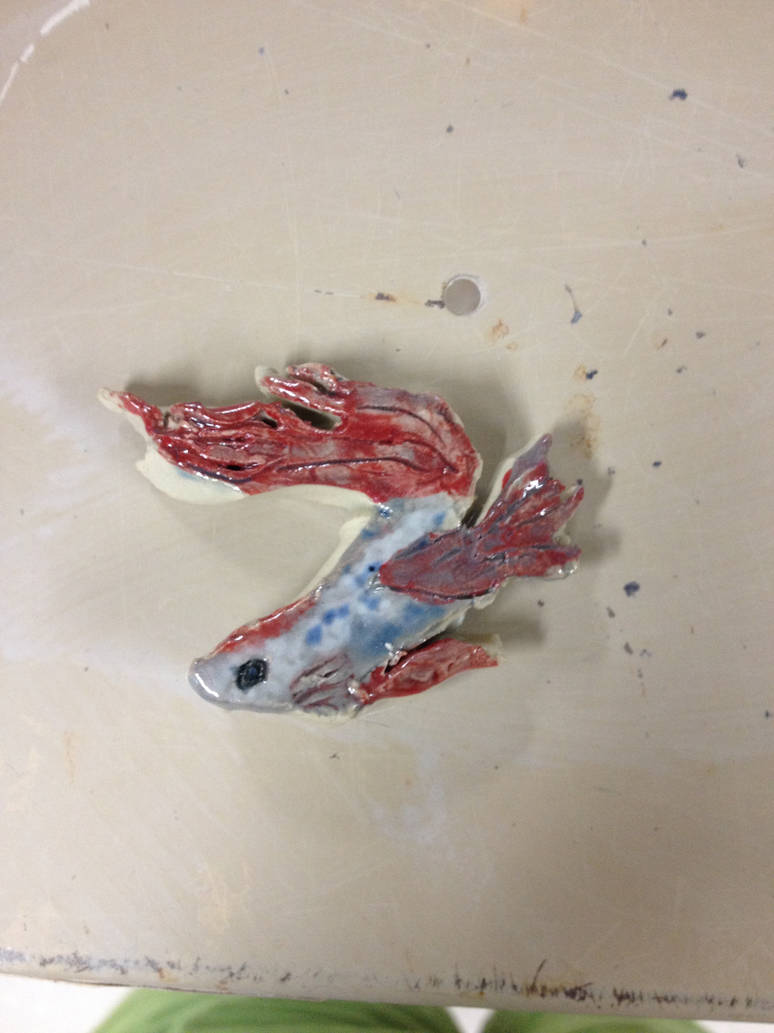
But the medallion was not to go in alone. I still had leftover clay, so I worked on some other medallions, or perhaps magnets, as the other two equine pieces are quite small. I also made a magnet of my late betta, Dude, who has yet to get a magnet on the fridge like the previous ones. Alas, I did not have enough to do one for my late betta female, Molly. 


The above unicorn medallion is another way of creating a medallion, and one that appears to be quite common (from what I've seen). The horse is simply an added layer on top of the base. This is perfectly acceptable as a means of giving a piece depth, however, the piece will still appear 2D rather than having elements of 3D. This one was created in a similar method to above. The needle tool cut out the horse's shape, the shaping tool aided in securing that piece of clay to the base, and then it was just detail work from there. 


The above is another one based off my mare, Snowflake. I used the building method from the first medallion to build up the hips, part of the back, withers, and the upper part of the neck, then I just used the needle tool to get her general face shape on the medallion. 

Once all my pieces were completed they went into the oven for 15 minutes per the Sculpey package instructions. You will notice on the betta magnet that it has some foil under the fin to keep the fin's shape that I wanted, there is also a bit of foil underneath, curving the shape. This was more what I wanted to do with the first medallion originally, but decided against. Once cooled, they're ready for painting! 


I hope this helpful to anyone who's just starting out! I am by no means an expert, and I will always have more to learn (as does everybody, really as one ceases to grow if one refuses to learn anymore). 

Till the next time!


Tuesday, April 9, 2019

Tools of Sculpting


(Above: My clay tool box-but what's inside it?)

As May Medallion Madness approaches, a NaMoPaiMo like event, that is having it's first year be exclusively held on Model Horse Blab, there are many people who find themselves wanting to sculpt a medallion. Myself included. Some of us do have medallions ready to paint for the event (I just need to prime my Ronald the Mule medallion by Audrey Dixon), but as some have never sculpted before, I thought I'd do a little "Tools of the Trade" post.

(Above: A thrown pig sculpture done, by the late, Bruce Howdle, fondly named Gerti.)

I was fortunate in my four years of college to come across the Clay Club on campus, for my Jr. & Sr. years, I participated in Clay Club and served as an officer in the club too. Our instructor/head of the club was Bruce Howdle, a well known relief sculptural muralist and potter. I was fortunate to be able to take classes with him as well, and as I stated that I had admired his style of ceramic since we visited his studio in Mineral Point, WI in high school, he showed me some of his own techniques for sculpture and reliefs, and adapted them to my own style.

One of the things I learned from Bruce is the importance of the tools you use on your pieces. Now don't fret. Many of the tools I have in my own clay box are not hard to find, and many of them you may have in your house or can easily find!

(Above: Clay wire cutters. You will notice that many of my tools have blue tape on them. This was to identify them as mine in my college ceramics studio.)

If you are fortunate that you have access to clay-clay or a ceramics studio (I will not have either for making this medallion), you will want to have clay wire cutters. They make it easier to get a reasonable sized chunk of clay to work with.

(Above: Recently acquired rolling pin from the dollar store.)

Probably the easiest to find is the rolling pin. This tool is essential, especially if you're to make a medallion. Ideally, we'd all have access to slab rollers which would do the hard work for us, but alas, that's not the case. For consistency, you will want a ruler on hand too to check the thickness of your starting slab to make sure it is not uneven.

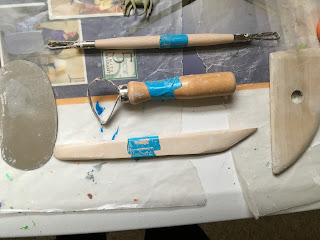
(Above: Various shaping & carving tools in my clay box.)

We'll start with the more typical tools first. Shaping tools can be very important in a piece be it a sculpture or a relief, like a medallion. There are various sizes and styles. These will help smooth out edges, aid in combining slabs of clay, and sometimes applying detail. Carving tools are also important, even in relief. You may need to take away some clay to get the right shape with limited risk of obscuring or ruining details you've already put in.

A needle tool is also a necessity, as it can help make fine cuts from the clay, carve in details, and overall, I've found this to be the most useful/used tool in my clay box.

(Above: Some letters/number imprints, needle tool, mesh, and impression of tree bark help add texture to my pieces.)

If there is one thing I learned from Bruce (and I assure you, I learned many things) it was that tools for clay can be found anywhere. Being more of a textural artist, Bruce had a plethora of tools at his disposable, and many of them were quite common. Gears, salt bricks, bricks, shells, wood/tree bark etc. Many everyday, common items that you can find or can easily acquire to get texture.

(Above: Jewelry chain, tiny gears, keys and buttons are all everyday items that can be used to give your piece texture.)
Everyday house items can be great at getting texture too, just in case you don't have a tool kit on hand, or don't live near the great outdoors. Keys, jewelry chains, buttons, spirals on spiral notebooks, etc. can be used to create texture on a piece.

(Above: My scrap of Shamwow!)

A college friend supplied me with this next item and that is a Shamwow! Oh yes. I kid you not. This cloth/towel from TV is wonderful in helping to smooth out edges. Admittedly, it was used more on thrown pieces to make the lips smoother, but it can be used on reliefs too as it can help smooth out dings, accidental finger prints, etc.

(Above: Brick I grabbed from my yard as I'm thinking I might want the texture for my medallion's background.)

Once you've got the tools, don't be afraid to experiment with them and have some fun! Even if you don't have the tools, you should still experiment and have fun! Use what you have and let your creativity run wild!

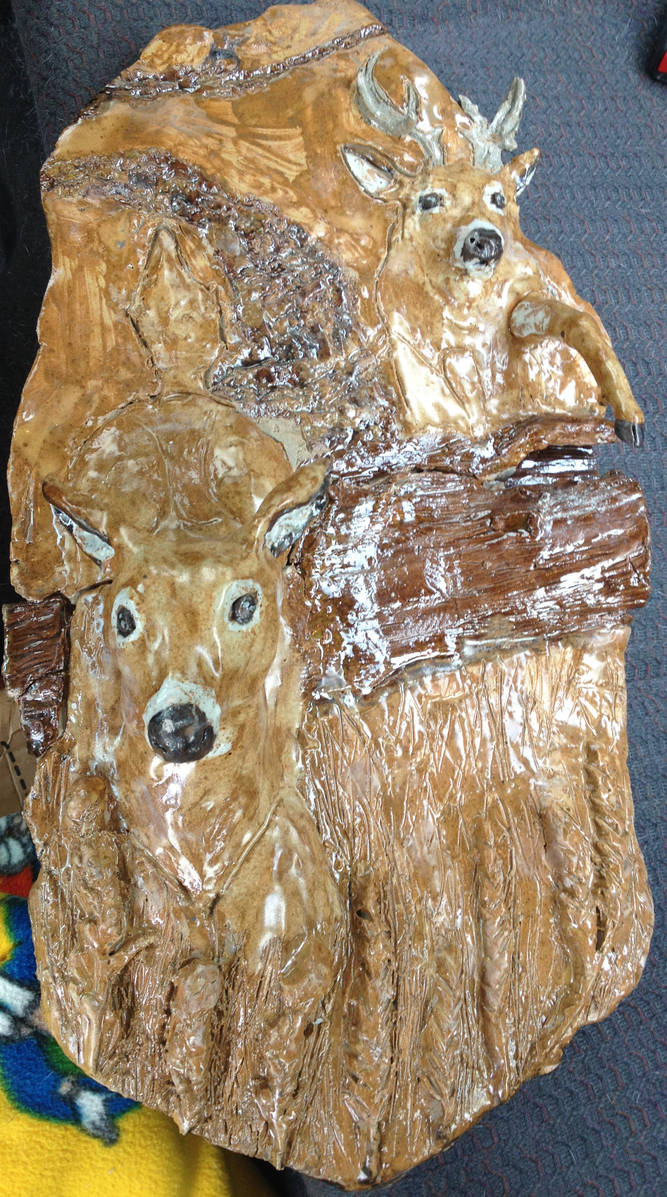
(Whitetail Trail-a wall hanging made for a friend. Tree bark, cast impressions of wheat, and a salt brick were used for textures.)
(Magnet of my late betta, Raku, detailing done with a needle tool.)

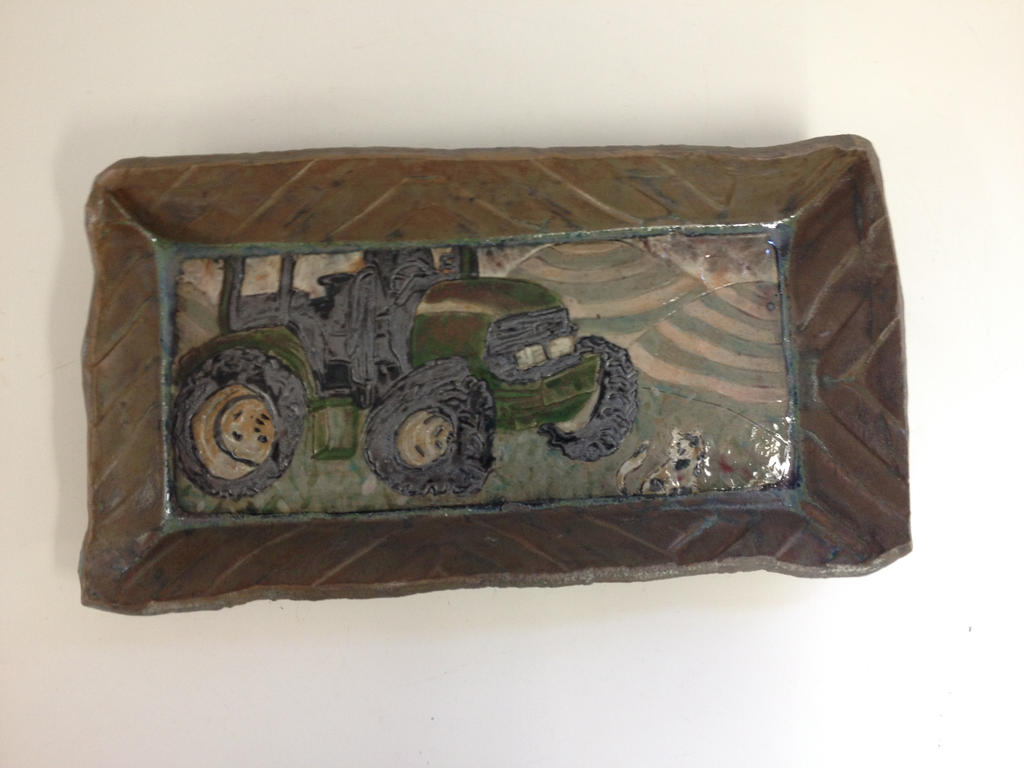
(Tractor plate, edge texture done with a drill bit.)

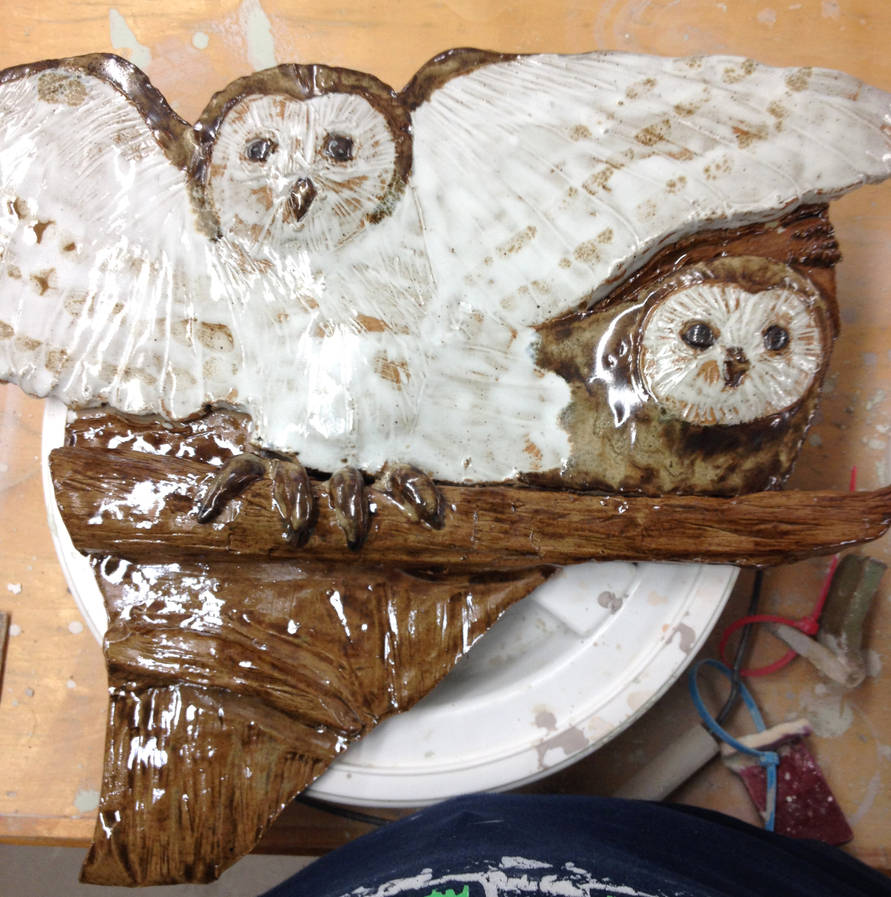
(Barn Owl wall hanging, texture done using wood block and needle tool.)

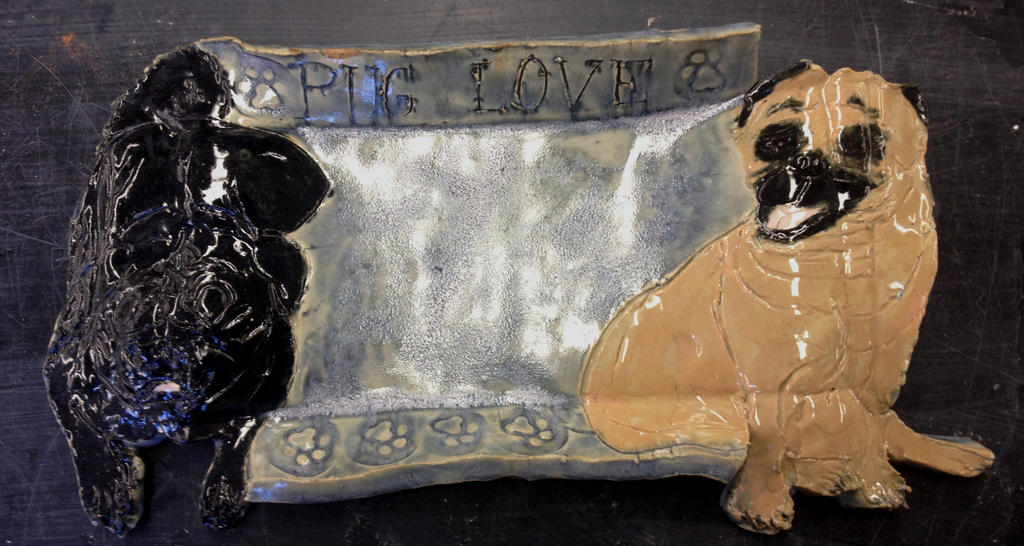
(Pug Plate-details done with needle tool, shaping tools used to keep edges crisp & pugs' shapes on edges.)

(Decorative plate-texture accomplished using various letter/number stamps.)

(Leaf Plate-With access to a kiln you can use leaves, needles, and small twigs to create texture by leaving them on your piece. When it's fired in a kiln the plant matter burns off. Colors on this plate are glaze, not the leaves, they just left their impressions.)

Till the next time!