Thursday, April 11, 2019

Making a Medallion

Clay is a fascinating, fun and relaxing medium to work in and it's one I've very much missed working in. 

First, let's take a look at the tools I used to create this medallion: a rolling pin, a shaping tool, a needle tool and part of a brick.


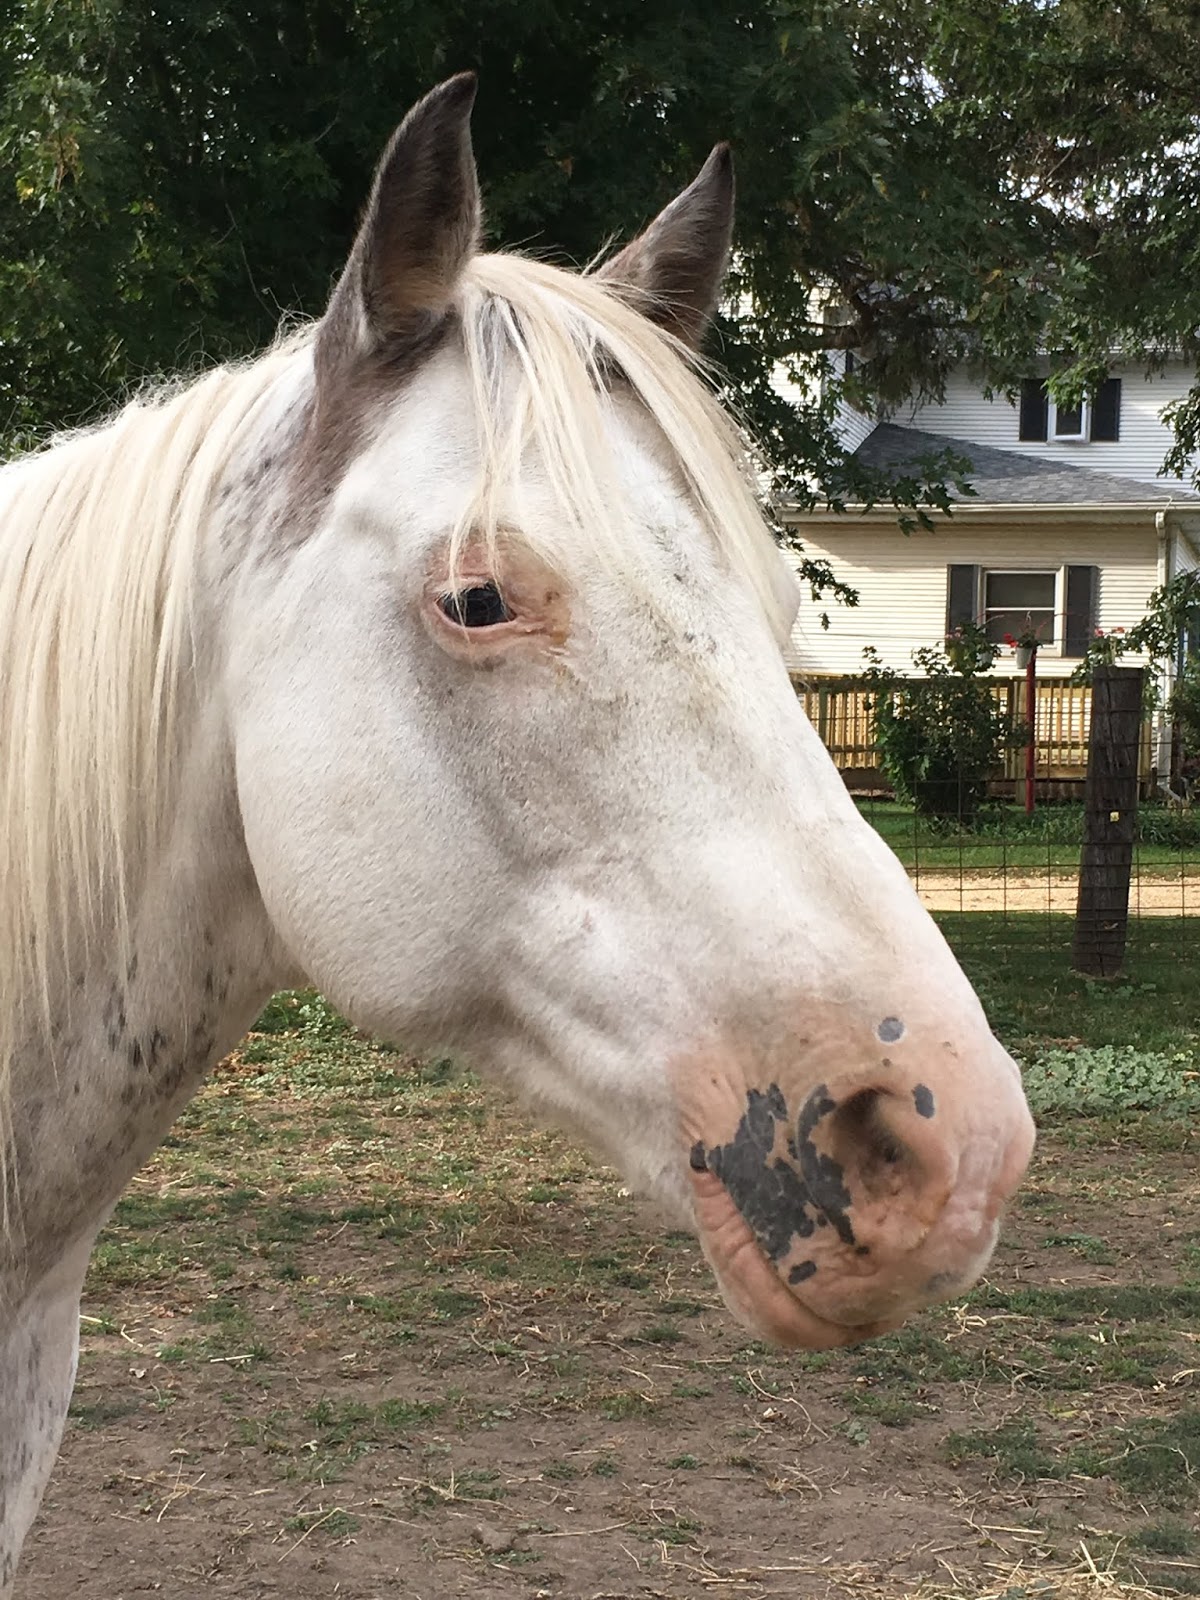
Next, we should look at my subject for this medallion, my mare, Snowflake. Now I do have a fairly good idea, even after I sold her, of her anatomy as well as a horse's anatomy in general. This is an important thing to understand as it will aid you, the sculptor, in creating your piece. The more knowledge you have, the better your piece will look.


As I do not have clay-clay available, or even a ceramics studio nearby to work in, I chose to work in Sculpey clay as I find it to be a reasonable substitute for true clay. I start by rolling out the clay to my desired thickness. With this medallion being for me, I wasn't too worried about consistency of the thickness, if this were for production, I would have used the ruler to make sure it was all level, or even had several rulers of similar width together so that I could get an even thickness throughout. From there, I proceeded to cut my edges off to make a square, as I wanted to do a square medallion.


Once I cut the square, I realized I had a boo-boo on one of the corners from not going slowly enough with my needle tool when cutting. So I altered my plan, which you will see at the end. 


In the meantime, I smoothed out the edges. You can do this with water, or if you aren't worried about what others might think/it's just for you...you can use saliva too (plus, it goes into an oven or kiln, germs will be killed off). I then proceeded to free-hand a drawing of my mare onto the clay itself with the needle tool. After I'd completed this, my friend, Shannon, reminded me that I you could also trace your original reference (hard for me as it's on my computer screen-which is also a touch screen) and then proceed from there to get the features onto your clay. 


Originally, I wanted to just manipulate the clay, but I had the clay too thin to do this, so instead, I built up from the drawing. Immediately, you will see that I oopsed and made my mare's muzzle too long, and didn't correct it, but you will also notice that we now have depth to the piece, and that was from just adding the muzzle. I added said muzzle by rolling out another small sheet of clay and morphing it to the muzzle's rough shape. As it is hollow inside that piece, I will add a hole later on so I don't risk that part blowing up in the oven.


From here, I continued to build up the face with clay, while still working to create depth. The idea is that the clay will "fade" to the original drawing. I also added Snowflake's eye by carving it out, and then rolling a small ball of clay and placing said ball into the hole. If the ball is too big, it will "bulge" out, and if it's too small, it will not fill the hole adequately. To ensure that the ball stays, use water or saliva again to help it adhere.


Then I proceeded to build up areas of the face an neck. I also added the edge of her nearest ear and carved out the hollow part of both ears. I also used the needle tool to add a mane and forelock. Note that I do not necessarily follow Snowflake's picture to a "T". While it's fine if you choose to do so, it's artistic freedom that allows for creativity to flow too. 


Next, I start to smooth out all those lumps and bumps of clay, working to get them to resemble a horse more closely rather than the building blocks they were. Again, water or saliva (you don't have to lick the piece either, just the tip of your finger) to get the clay to smooth out. I also started to add lines to exaggerate where the parts of the horse's face.


I continued to smooth out the face, and then I used the brick to give texture to the background. I really like texture on ceramic pieces, and this is no exception! I also used the needle tool to cut the other three corners off. I could have added clay to that original base, but I decided I liked this look better.


I then went through with the curved edge of my shaping tool to define my mare's face against the background and to aid in the overall shape and definition of her head too. 


I continued to work on the medallion doing little finishing touches, that continued to emphasize the head, smooth out the bumps and such that were still on the medallion including the hole at the nostril I mentioned above. From there, it was to the oven.


But the medallion was not to go in alone. I still had leftover clay, so I worked on some other medallions, or perhaps magnets, as the other two equine pieces are quite small. I also made a magnet of my late betta, Dude, who has yet to get a magnet on the fridge like the previous ones. Alas, I did not have enough to do one for my late betta female, Molly. 


The above unicorn medallion is another way of creating a medallion, and one that appears to be quite common (from what I've seen). The horse is simply an added layer on top of the base. This is perfectly acceptable as a means of giving a piece depth, however, the piece will still appear 2D rather than having elements of 3D. This one was created in a similar method to above. The needle tool cut out the horse's shape, the shaping tool aided in securing that piece of clay to the base, and then it was just detail work from there. 


The above is another one based off my mare, Snowflake. I used the building method from the first medallion to build up the hips, part of the back, withers, and the upper part of the neck, then I just used the needle tool to get her general face shape on the medallion. 

Once all my pieces were completed they went into the oven for 15 minutes per the Sculpey package instructions. You will notice on the betta magnet that it has some foil under the fin to keep the fin's shape that I wanted, there is also a bit of foil underneath, curving the shape. This was more what I wanted to do with the first medallion originally, but decided against. Once cooled, they're ready for painting! 


I hope this helpful to anyone who's just starting out! I am by no means an expert, and I will always have more to learn (as does everybody, really as one ceases to grow if one refuses to learn anymore). 

Till the next time!


Tuesday, April 9, 2019

Tools of Sculpting


(Above: My clay tool box-but what's inside it?)

As May Medallion Madness approaches, a NaMoPaiMo like event, that is having it's first year be exclusively held on Model Horse Blab, there are many people who find themselves wanting to sculpt a medallion. Myself included. Some of us do have medallions ready to paint for the event (I just need to prime my Ronald the Mule medallion by Audrey Dixon), but as some have never sculpted before, I thought I'd do a little "Tools of the Trade" post.

(Above: A thrown pig sculpture done, by the late, Bruce Howdle, fondly named Gerti.)

I was fortunate in my four years of college to come across the Clay Club on campus, for my Jr. & Sr. years, I participated in Clay Club and served as an officer in the club too. Our instructor/head of the club was Bruce Howdle, a well known relief sculptural muralist and potter. I was fortunate to be able to take classes with him as well, and as I stated that I had admired his style of ceramic since we visited his studio in Mineral Point, WI in high school, he showed me some of his own techniques for sculpture and reliefs, and adapted them to my own style.

One of the things I learned from Bruce is the importance of the tools you use on your pieces. Now don't fret. Many of the tools I have in my own clay box are not hard to find, and many of them you may have in your house or can easily find!

(Above: Clay wire cutters. You will notice that many of my tools have blue tape on them. This was to identify them as mine in my college ceramics studio.)

If you are fortunate that you have access to clay-clay or a ceramics studio (I will not have either for making this medallion), you will want to have clay wire cutters. They make it easier to get a reasonable sized chunk of clay to work with.

(Above: Recently acquired rolling pin from the dollar store.)

Probably the easiest to find is the rolling pin. This tool is essential, especially if you're to make a medallion. Ideally, we'd all have access to slab rollers which would do the hard work for us, but alas, that's not the case. For consistency, you will want a ruler on hand too to check the thickness of your starting slab to make sure it is not uneven.

(Above: Various shaping & carving tools in my clay box.)

We'll start with the more typical tools first. Shaping tools can be very important in a piece be it a sculpture or a relief, like a medallion. There are various sizes and styles. These will help smooth out edges, aid in combining slabs of clay, and sometimes applying detail. Carving tools are also important, even in relief. You may need to take away some clay to get the right shape with limited risk of obscuring or ruining details you've already put in.

A needle tool is also a necessity, as it can help make fine cuts from the clay, carve in details, and overall, I've found this to be the most useful/used tool in my clay box.

(Above: Some letters/number imprints, needle tool, mesh, and impression of tree bark help add texture to my pieces.)

If there is one thing I learned from Bruce (and I assure you, I learned many things) it was that tools for clay can be found anywhere. Being more of a textural artist, Bruce had a plethora of tools at his disposable, and many of them were quite common. Gears, salt bricks, bricks, shells, wood/tree bark etc. Many everyday, common items that you can find or can easily acquire to get texture.

(Above: Jewelry chain, tiny gears, keys and buttons are all everyday items that can be used to give your piece texture.)
Everyday house items can be great at getting texture too, just in case you don't have a tool kit on hand, or don't live near the great outdoors. Keys, jewelry chains, buttons, spirals on spiral notebooks, etc. can be used to create texture on a piece.

(Above: My scrap of Shamwow!)

A college friend supplied me with this next item and that is a Shamwow! Oh yes. I kid you not. This cloth/towel from TV is wonderful in helping to smooth out edges. Admittedly, it was used more on thrown pieces to make the lips smoother, but it can be used on reliefs too as it can help smooth out dings, accidental finger prints, etc.

(Above: Brick I grabbed from my yard as I'm thinking I might want the texture for my medallion's background.)

Once you've got the tools, don't be afraid to experiment with them and have some fun! Even if you don't have the tools, you should still experiment and have fun! Use what you have and let your creativity run wild!

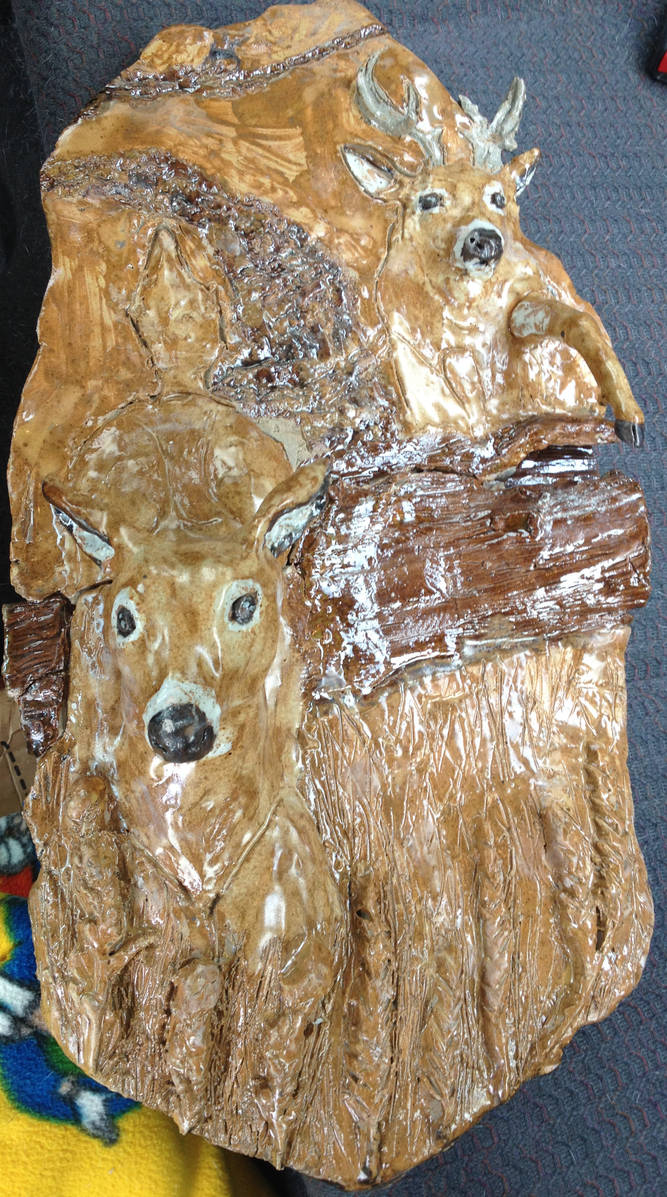
(Whitetail Trail-a wall hanging made for a friend. Tree bark, cast impressions of wheat, and a salt brick were used for textures.)
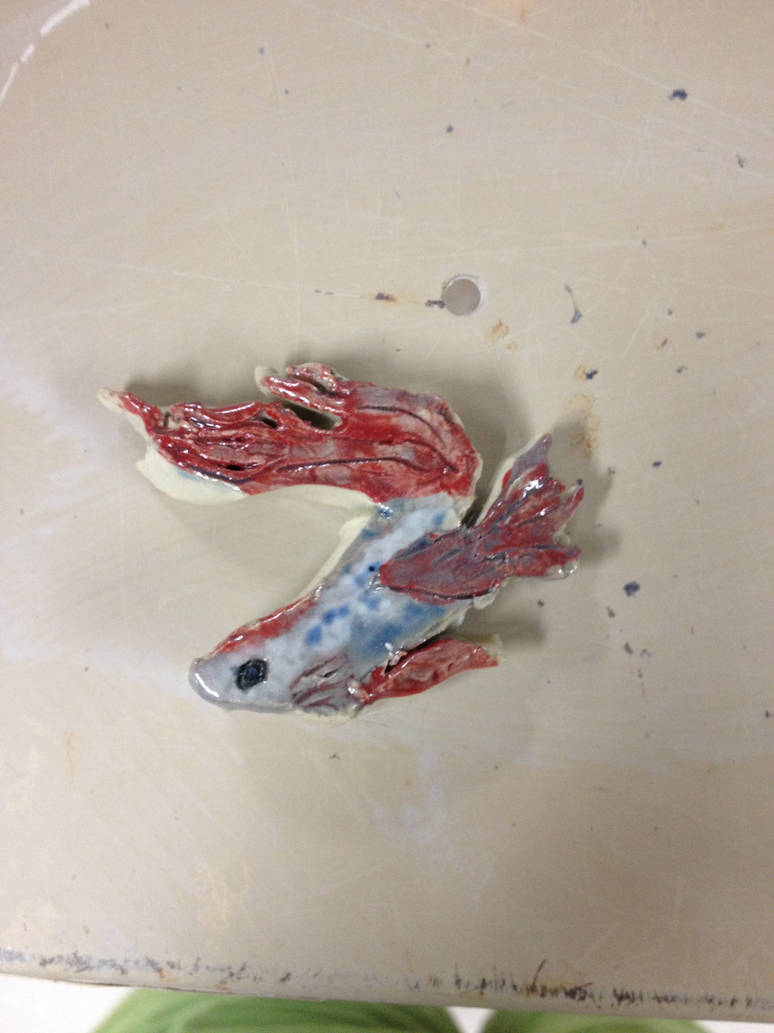
(Magnet of my late betta, Raku, detailing done with a needle tool.)

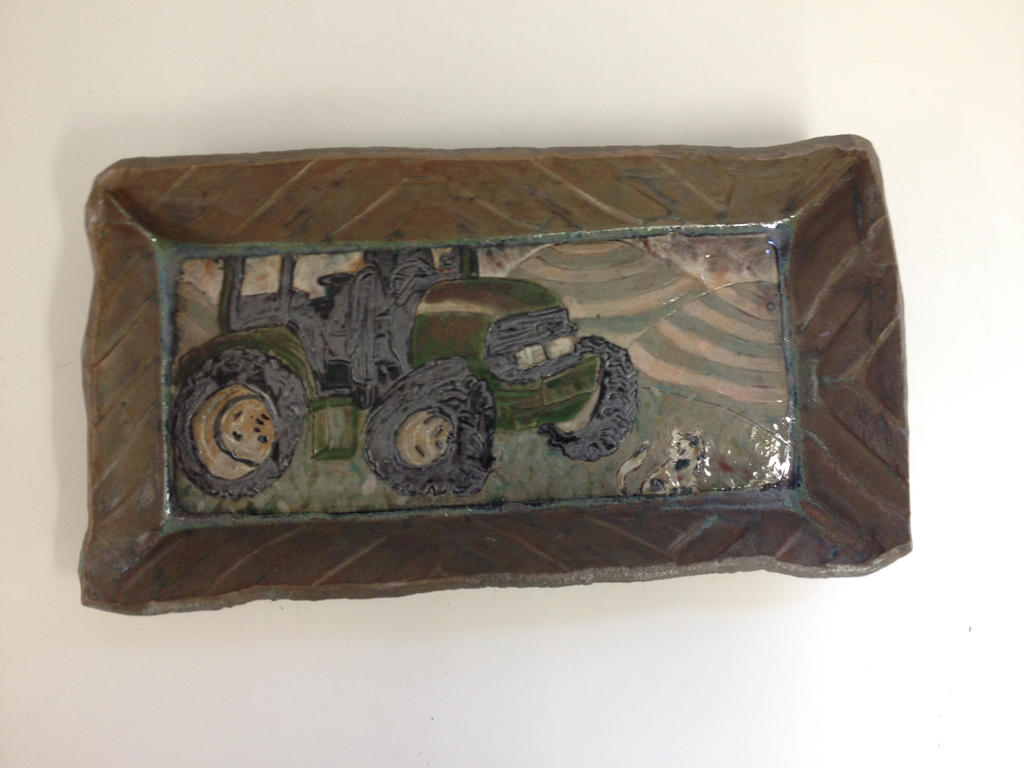
(Tractor plate, edge texture done with a drill bit.)

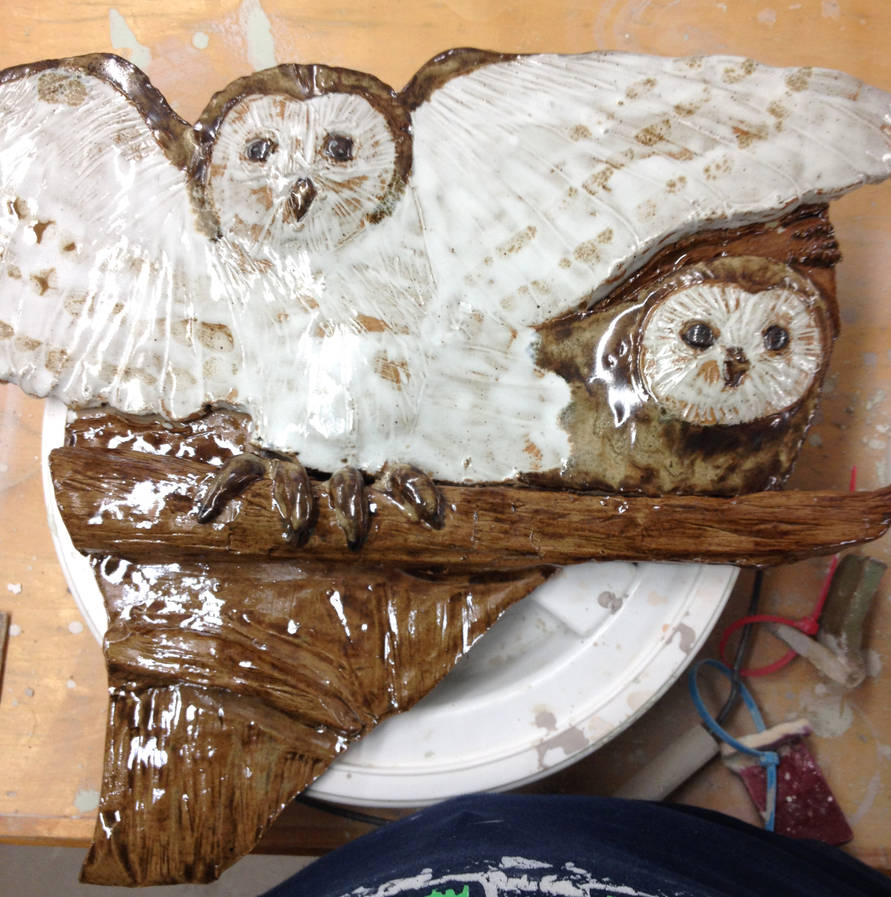
(Barn Owl wall hanging, texture done using wood block and needle tool.)

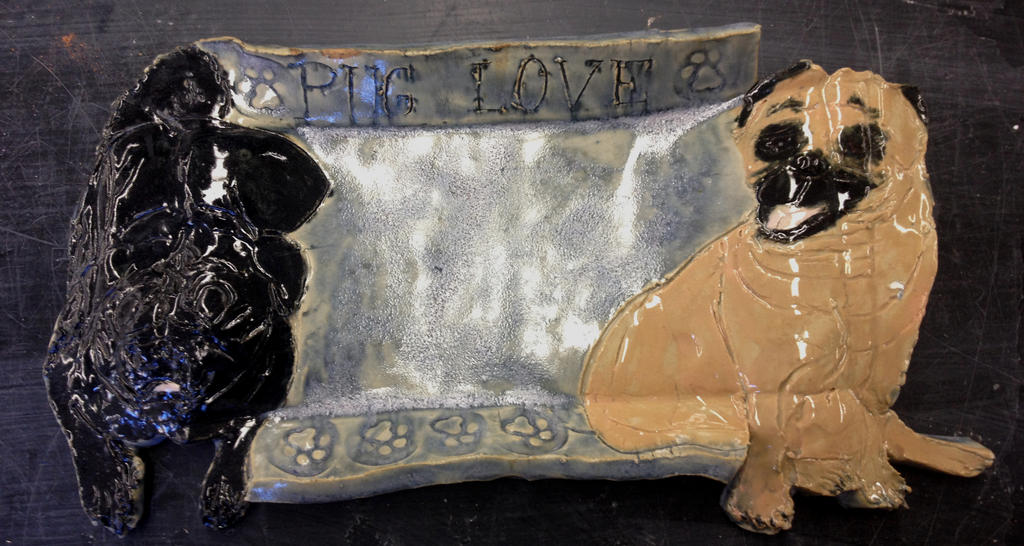
(Pug Plate-details done with needle tool, shaping tools used to keep edges crisp & pugs' shapes on edges.)

(Decorative plate-texture accomplished using various letter/number stamps.)

(Leaf Plate-With access to a kiln you can use leaves, needles, and small twigs to create texture by leaving them on your piece. When it's fired in a kiln the plant matter burns off. Colors on this plate are glaze, not the leaves, they just left their impressions.)

Till the next time!


Friday, April 5, 2019

I Missed Thursday...

So have a Friday post instead!

Due to how my week started off, I have been a bit rattled to say the least. The repair to my vehicle wasn’t super expensive but it made my budgeting all the more difficult.  But the sadness, stress & rattling won’t last. It’s just a blip on the happiness radar.

Till the next time!

Tuesday, April 2, 2019

Well...

Sometimes life likes to throw you sucker punches...like dropping your vehicle’s whole rear with only a little warning. It sucks...there are tears...and you try to move on.

Thursday, March 28, 2019

Let's Just Sit Back...

And look at some more pictures :)

(Picture taken from that exact angle. Lucky is such a good, cooperative pupper.)
(Fun view from under the trees' canopy.)

(You can see why people believe(d) in fairy folk with fungi like this.)

(Rusty-colt taking a little rest in the shelter.)

(Goat Close & Personal)

(Snowflake)

(Hibiscus)

(Nearly blind Betta, Dude, peeky-peeking.)

(Modes of transportation.)

(Look at that tail!)

(CHICAGO!!!)
(Zip-few spots/near white Appaloosa gelding...I miss this guy.)

(Smell the flowers-or do what Merlin did a second later-DIE FLOWER DIE!..He was a grumpy betta...and the flowers were fake.)

(Lucky's adorable eyes!)

(Natural abstract)

(Fluffed up squirrel)

And we'll end on one of my all time favorites. Till the next time!


Tuesday, March 26, 2019

Look at This Photograph

("Every time I do it makes me laugh" quotes Snowflake)
Photography is a fun, unique form of art. Capturing a moment in time, framing it how you want, heck, with the technology today, you can edit it to give off the feelings you want to convey too. Last post's photo spam nicely set today's post up.

(Lucky responding to a "come". Editted with a blue-toned filter to emphasize the cold of the day.)

There are several factors to consider when taking a photograph. First, is lighting: will you be able to accurately see your subject? Is your phone/camera capable of capturing your subject in said lighting? Is it a low-light shot? Does it require flash? Is there a shadow obstructing your subject? Not to mention, how does the lighting effect your subject? Is it too bright, making it look like the sun bit them? Is it giving them a halo? Lots of factors, just in this one category need to be considered.

(The soft morning light gives this pony a lovely "halo" as it gets a drink of water)

If you've determined that your lighting is sufficient, then you need to move on to perspective. Do you want to be even with your subject? On the same level? Higher than your subject? Lower than your subject? Perspective greatly influences the feelings of your shot. For example, a panoramic shot of a landscape may be taken from a higher level as you are better able to capture the vastness of the landscape. On that same note, some landscapes are shot from the same height or only slightly above. The feeling of vastness is still there, but it's less overwhelming, and can be more inviting than a higher perspective. If you go for a lower perspective, you can give your subject a sense of power, like a statue looming over you, the photographer and the photograph's viewers. Or, you can simply capture things from a new angle. 

(A curious expression is given to this model due to the lower position I have taken)
Now that you've considered the lighting and perspective, you need to consider how you are going to frame your shot. In photography there is a rule of threes, or more specifically you divide your picture into three. Regardless if you are doing portrait or landscape, you can divide it in three vertically or horizontally, you can even get creative with your shot and divide it in three diagonally too. The idea of the rule of three is that you want to be able to draw the viewer's eye throughout the picture, not just to one spot. 

(This barn cat photo shows how having your subject off center, as well as the texture of the grass draw your eye through the photo)

From there it's a matter of point and shoot. Over, and over, and over again. It takes practice to get good at photographing what you like, and lots of patience. Personally, I like to photograph a variety of things, but mainly animals, particularly close ups (especially of my fish-my Bettas were quite small) as well as eyes. 

(Raku, a male Crowntail Betta, peeking through his plants)

While you do not necessarily need high quality or expensive equipment if you are merely doing photography as a hobby a better camera and lenses really do aid in the quality of the picture. If you decide that photography is a viable career path for you, then you should consider making the investment into the equipment. I would like to, but at the moment, my camera phone and lower cost camera work just fine. 

(A Paint horse gelding's blue eye and facial marking)

Lastly, you've taken the perfect shot. Now you need to edit it. Sometimes no editting is needed for that shot, other times cropping the photo, adding filters, changing from color to black and white, or even getting the color levels to more accurately match real life can be done to the photograph. Be aware, that in contests this may not be allowed (color altering anyway-can't say with absolute certainty as I haven't entered any photo contests). These slight changes can elevate your photograph or make it more how you wanted it to be. 

(This gentle giant showing how hard it can be to get a large subject in frame)

Find what makes you happy and photograph it! It can be anything! Shadows (new favorite of mine), people (though not in a creepy way...watching Criminal Minds, don't mind me!), animals, nature, architecture, modes of transportation, there is literally an endless amount of subjects for you to pick from, and remember, it doesn't have to be a job, it can just be a fun hobby. It can also be social too, as there are platforms like Instagram that allow you to share either with friends or publicly. You can follow me on there under what's_in_a_day?.

(Shadows can be just as tricky to photograph as the subject themselves, thankfully, mine was cooperative)

Do any of you have photography as a hobby? What do you photograph? Are you interested in photography as a hobby? Career? 

(Going back to perspective: being above the deer added to this already somber scene)

Till the next time!

(Emphasis on lighting and camera capabilities. Thankfully, for me, my phone was able to capture this sunrise)